Migrating Private Repos from BitBucket to GitHub
With the recent announcement from GitHub changing their policy on free accounts to include unlimited private repositories, I wanted to migrate some of my existing private repos from BitBucket to GitHub so that everything was neatly in one place. While GitHub has their web-based Importer tool for this purpose, it wasn’t working for me due to the fact that I have two-factor authentication enabled at BitBucket, and I also have email privacy enabled at GitHub which prevents commits that would reveal my private email address.
Thankfully there’s a straightforward process you can follow using the command line that will bring across your repo with all it’s branches and commit history without any fuss. Let’s get started!
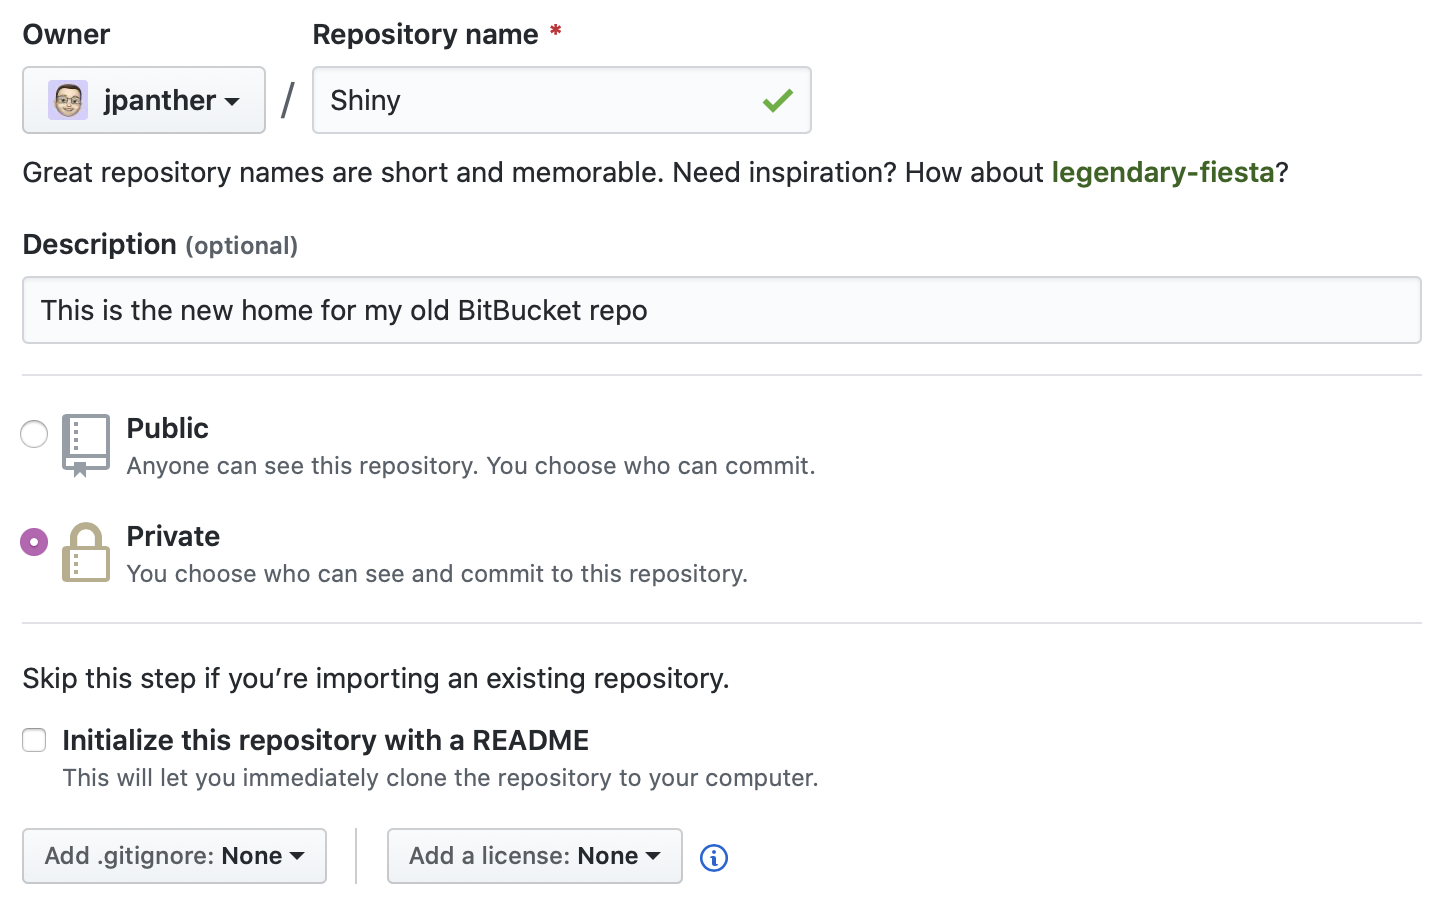
1. Create a new GitHub repository #
To begin, we need to create a new GitHub repo to host your project. Give it a name and description - to keep it simple, you probably want to use the same name as the existing BitBucket repo. Then select the Private option and be sure that the option to Initialize this repository with a README is unchecked. You should also leave the Add .gitignore and Add a license options set to None as you don’t want any of these to conflict with your existing repo.
2. Clone a bare copy of your BitBucket repo #
Now we need to clone your existing repo from BitBucket. You can find the correct path for your BitBucket repo by clicking the Clone button at bitbucket.org. You can use either the SSH or HTTPS method depending on your local setup.
# SSH
git clone --bare git@bitbucket.org:{bbusername}/{repo}.git

# HTTPS
git clone --bare https://{bbusername}@bitbucket.org/{bbusername}/{repo}.git
3. Rewrite your commit history with your GitHub details #
If you’re using different names and email addresses between your BitBucket and GitHub accounts, you will need to ensure your existing commits are updated with the new details. Now that we have a local copy of the repo, we can easily make these changes. This step is optional if you don’t need to change your name or email address. If your GitHub profile is set to keep your email address private and you also have it set to block command line pushes that expose your email address, you will most likely need to complete this step.
Change into the repo directory that you just cloned and create a new shell script.
cd {repo}.git
nano git-author.sh
Now copy and paste the script below into the text editor. This script is provided by GitHub and will loop through your prior commits and update the author details. Change your-old-email@example.com to the email address you were using for commits on BitBucket. Now change Your Correct Name to your name and your-correct-email@example.com to your GitHub name and email address. If you’re blocking pushes that reveal your address, this address should be the one assigned by GitHub in your account settings. You can find this by going to GitHub Settings > Emails and looking under the Keep my email address private setting. The email address will look something like 123456+username@users.noreply.github.com.
#!/bin/sh

git filter-branch --env-filter '
OLD_EMAIL="your-old-email@example.com"
CORRECT_NAME="Your Correct Name"
CORRECT_EMAIL="your-correct-email@example.com"
if [ "$GIT_COMMITTER_EMAIL" = "$OLD_EMAIL" ]
then
    export GIT_COMMITTER_NAME="$CORRECT_NAME"
    export GIT_COMMITTER_EMAIL="$CORRECT_EMAIL"
fi
if [ "$GIT_AUTHOR_EMAIL" = "$OLD_EMAIL" ]
then
    export GIT_AUTHOR_NAME="$CORRECT_NAME"
    export GIT_AUTHOR_EMAIL="$CORRECT_EMAIL"
fi
' --tag-name-filter cat -- --branches --tags
Save the file using Control + X and then Return to confirm.
Now execute your script:
chmod +x git-author.sh
./git-author.sh
You should then see an output of “Rewrite” lines for each commit in your repo’s history. When you see the line “Ref ‘refs/heads/master’ was rewritten”, the command is complete and you can proceed to the next step. If you received a warning saying the history was unchanged, you’ll need to go back into the script and ensure you entered the correct ‘old’ email address and try running it again.
4. Push your repo to GitHub #
Now we’re ready to push our local copy to the empty GitHub repository. Make sure you’re in your git repo’s directory. If you skipped step 3, you’ll need to cd {repo}.git before executing this command. Don’t forget to replace your username and repo details with those from the new GitHub repository you created at step 1.
# SSH
git push --mirror git@github.com:{ghusername}/{repo}.git

# HTTPS
git push --mirror https://github.com/{ghusername}/{repo}.git
If you don’t see any warnings, you’re all set! You can now check your repo on the GitHub website and you should see the full contents and commit history. If you see the error below, you’ll need to go back and complete step 3 as it’s likely you didn’t enter the correct email details in the script.
# Something went awry :(
remote: error: GH007: Your push would publish a private email address.
remote: You can make your email public or disable this protection by visiting:
remote: http://github.com/settings/emails
5. Clean up and clone #
Finally, all that’s left to do is clean up the temporary local repo and clone the new GitHub version.
cd ..
rm -rf {repo}.git

# SSH
git clone git@github.com:{ghusername}/{repo}.git

# HTTPS
git clone https://github.com/{ghusername}/{repo}.git
That’s all there is to it. Now you can easily use GitHub for all your private repos.