Signing GitHub commits using Keybase
Since early 2016, GitHub has had a feature that prominently shows when git commits are signed. Doing so allows other people to trust that the changes they are viewing come from a trusted source.

Commits made on the GitHub website are automatically verified, however if you’re working with git locally, you’ll need to sign your commits using GPG before pushing them to GitHub. There are many ways to create and manage GPG keys, but I’m going to explain how to do it using Keybase, as it’s the way I manage my own keys.
If you care about your privacy like I do, you probably also use the GitHub email privacy feature to mask your email address when pushing commits and so this guide will show how to update your GPG key to allow you to sign using your masked address.
Before you begin #
This guide assumes you have:
Let’s begin…
Installing GPG #
Before we can make use of GPG keys on your local machine, we need to install a variant of GnuPG.
My preferred method is to use the Homebrew package manager to quickly install the command line version. If you haven’t got Homebrew on your Mac yet, check out my Getting Started with Homebrew guide before continuing.
brew install gnupg
Alternatively, you can install a graphical version of the tools by downloading GPG Suite.
Getting your Keybase GPG key #
The next step is to get a copy of your Keybase GPG key and add it to your local keyring. If you don’t already have a GPG key, you can create one using the command below and following all the prompts. Your Keybase profile page will show if you have a GPG key or not.
keybase pgp gen --multi
If you generate a new key-pair using the command above, it will automatically add it to the local GPG keychain. However, if you have an existing key that is stored on Keybase, you’ll want to export that now instead. You’ll be prompted for your Keybase password in order to export the key from your account.
keybase pgp export | gpg --import
keybase pgp export --secret | gpg --allow-secret-key-import --import
Now check the details of your GPG keyring:
gpg --list-keys --keyid-format SHORT

/Users/username/.gnupg/pubring.kbx
-------------------------------
pub   rsa4096/00D026C4 2017-04-09 [SC] [expires: 2021-04-09]
      85E38F69046B44C1EC9FB07B76D78F0500D026C4
uid         [ unknown] {Your Name}
sub   rsa4096/DBCBE671 2017-04-09 [E] [expires: 2021-04-09]
pub line, so in this example our key ID is 00D026C4.Adding your GitHub email address to your key #
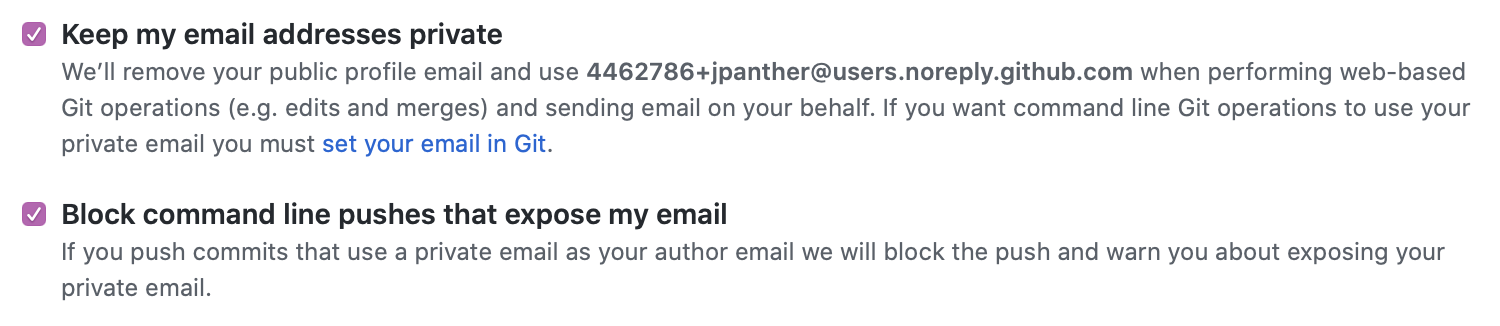
In order to sign your git commits, you first need to add the email address you use for git to your GPG key. If you’re using the GitHub email privacy features, the email address you’ll want to add here is your masked GitHub email. You can find this information by going to your GitHub email settings. The address will be in the format of 1234567+username@users.noreply.github.com.
If you don’t currently use the masked address, now is a great time to turn it on as it will allow you to keep your real email address private. Simply tick these two boxes and you’re good to go:
Now that you know your GitHub email address, let’s add it to the GPG key. Enter the following command, substituting KEYID for the ID you noted down from the --list-keys command in the previous step.
gpg --edit-key KEYID
You should now be presented with a screen that shows your key details and a new gpg> command prompt. At this prompt enter:
adduid
You’ll be prompted to provide the following details:
- Real name: Enter your actual name, or whatever name you use publically on GitHub.
- Email address: Enter your
1234567+username@users.noreply.github.comGitHub address. - Comment: This is optional, but entering
GitHubis a good reminder to your future self that this is what this ID is used for.
Once that is done, press O then Return to continue. You’ll then be prompted to enter your Keybase password to unlock the secret key.
Now you should be back at the summary screen with your new GitHub ID listed under your identities.
If everything looks good, at the gpg> prompt, type save and press Return.
Push your updated key to Keybase #
Now that you’ve updated the local copy of your GPG key, you need to push these changes to Keybase so they have a copy of the new identity.
keybase pgp update
Now that we have the key set up and ready to go, we just have to tell GitHub about it and then set our git client to use it when making commits.
Export your public key to GitHub #
In order for GitHub to be able to verify your commits, we need to provide them with a copy of your public GPG key. You can quickly get a copy of the key using the keybase command:
keybase pgp export
Alternatively, you can also get a copy from your Keybase profile page:
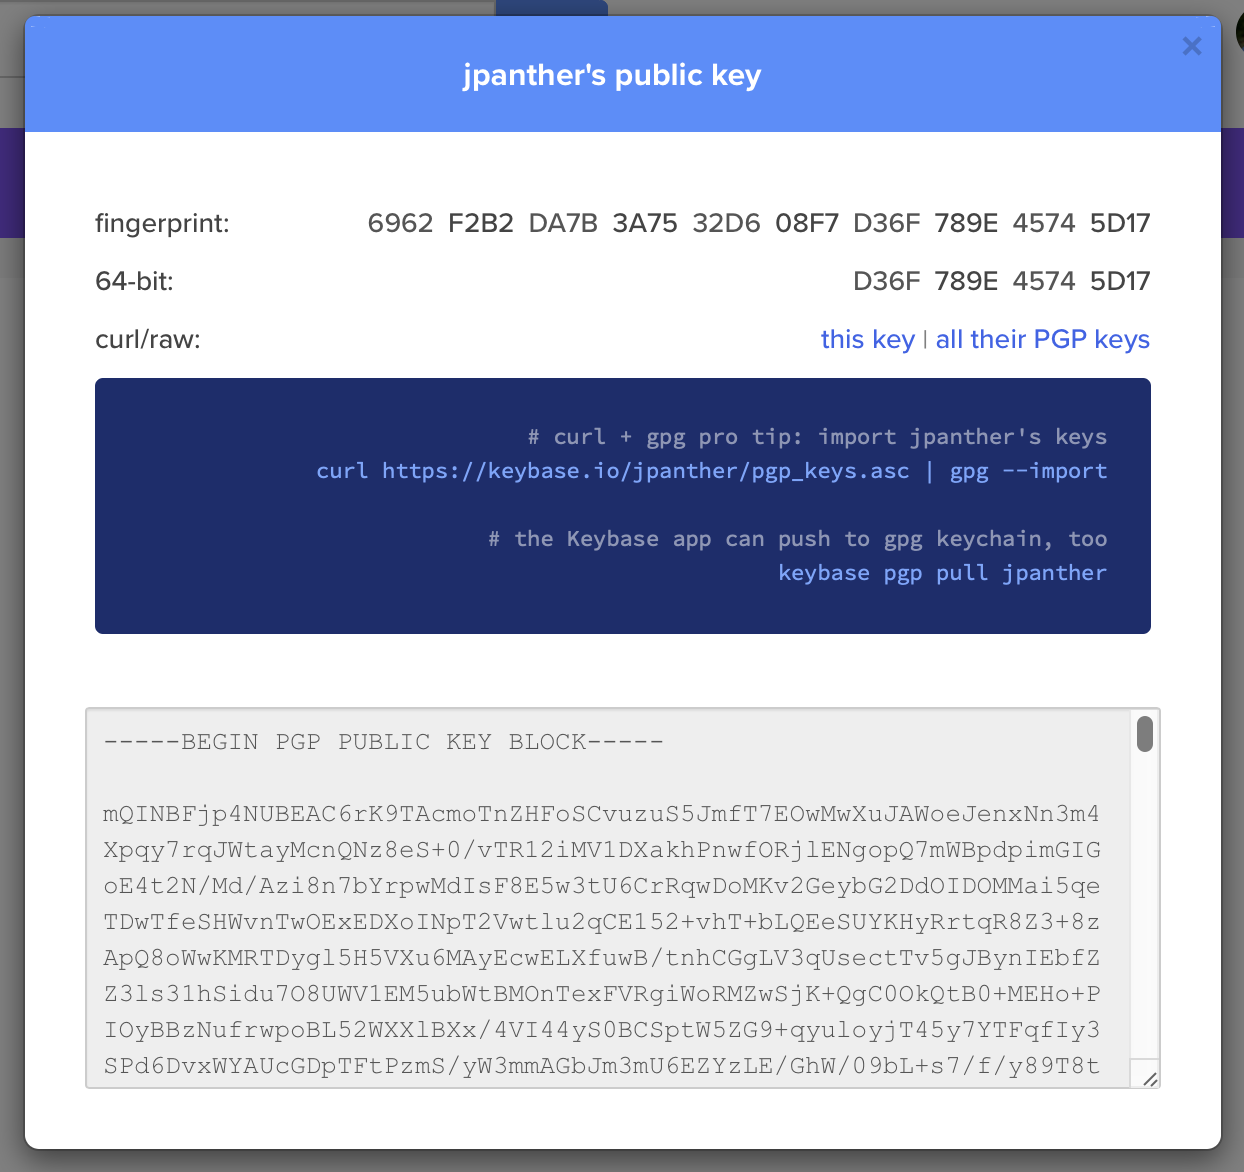
Whichever method you choose, copy the entire text including the BEGIN and END blocks.
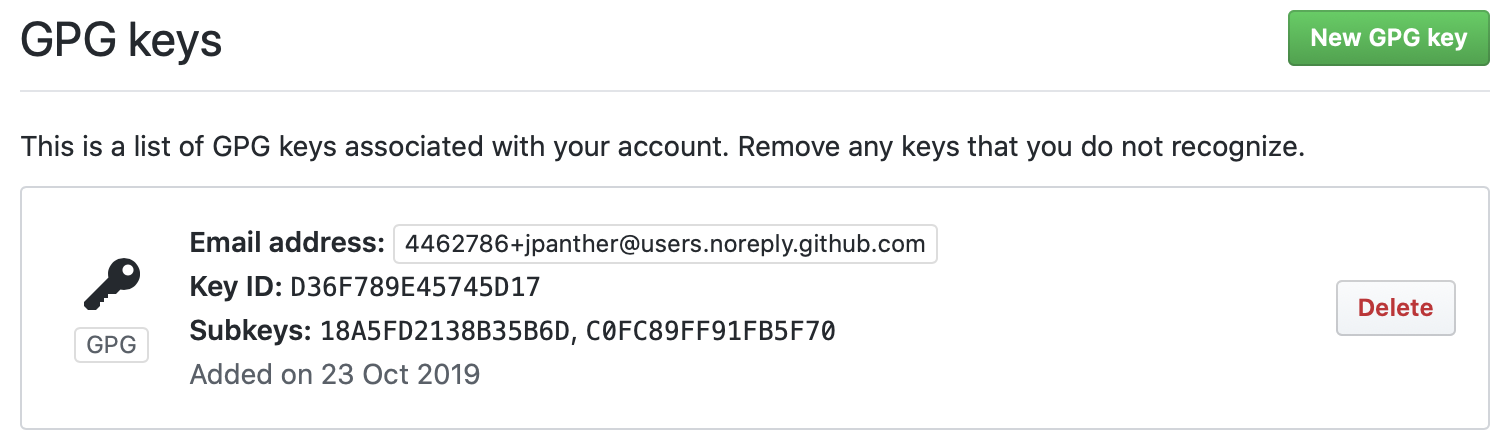
Now go to your GitHub SSH and GPG keys settings and press the green New GPG key button. Paste the text of your public key into the box and click Add GPG key.
Sign your commits #
The final step of this process is to sign your commits locally before you push them to GitHub. This is the easy part because all you have to do is add the --gpg-sign="uid" argument to your git commit command.
git commit --gpg-sign="1234567+username@users.noreply.github.com"
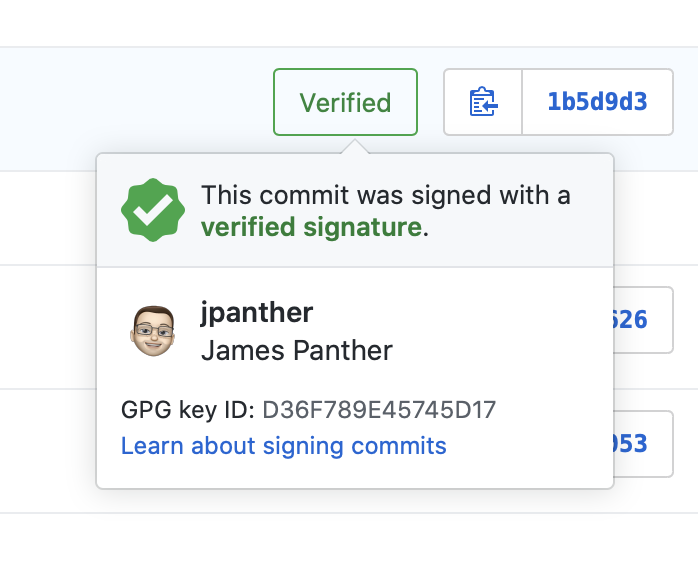
You’ll be prompted to enter your Keybase password in order to sign the commit, and assuming everything went to plan, if you push your local changes to GitHub, you should see the shiny new ‘Verified’ badge on your commit:
It’s obviously tedious to have to sign every commit using this long argument, but you can avoid this step entirely by adding your signing key to your .gitconfig file.
# For a single repository
cd ~/path/to/repository
git config user.signingkey 1234567+username@users.noreply.github.com

# For all repositories
git config --global user.signingkey 1234567+username@users.noreply.github.com
Once you do this you can now simply use --gpg-sign or -S on your commit command to sign the commit without providing an email address.
git commit -S
If this is still too much to remember, you can also tell git to sign all commits by default.
# For a single repository
cd ~/path/to/repository
git config commit.gpgsign true

# For all repositories
git config --global commit.gpgsign true
Now you can just use the git commit command normally without any additional arguments and your commits will be automatically signed. If you’re ever in the situation where you don’t want to sign a commit, you can use the argument --no-gpg-sign to prevent your signature being applied on a per-commit basis.
Further reading #
For more detailed information, you can visit the GitHub Help pages or check out my guide to using Keybase for SSH to learn more cool things you can do with your GPG key.